Showing posts with label eyes. Show all posts

Friday, April 12, 2013

Glitter Gal Transitions and Violet Eyeshadow Look

I feel like matching my eyeshadow to my nails. What better way to do it than use Glitter Gal Transitions shades?

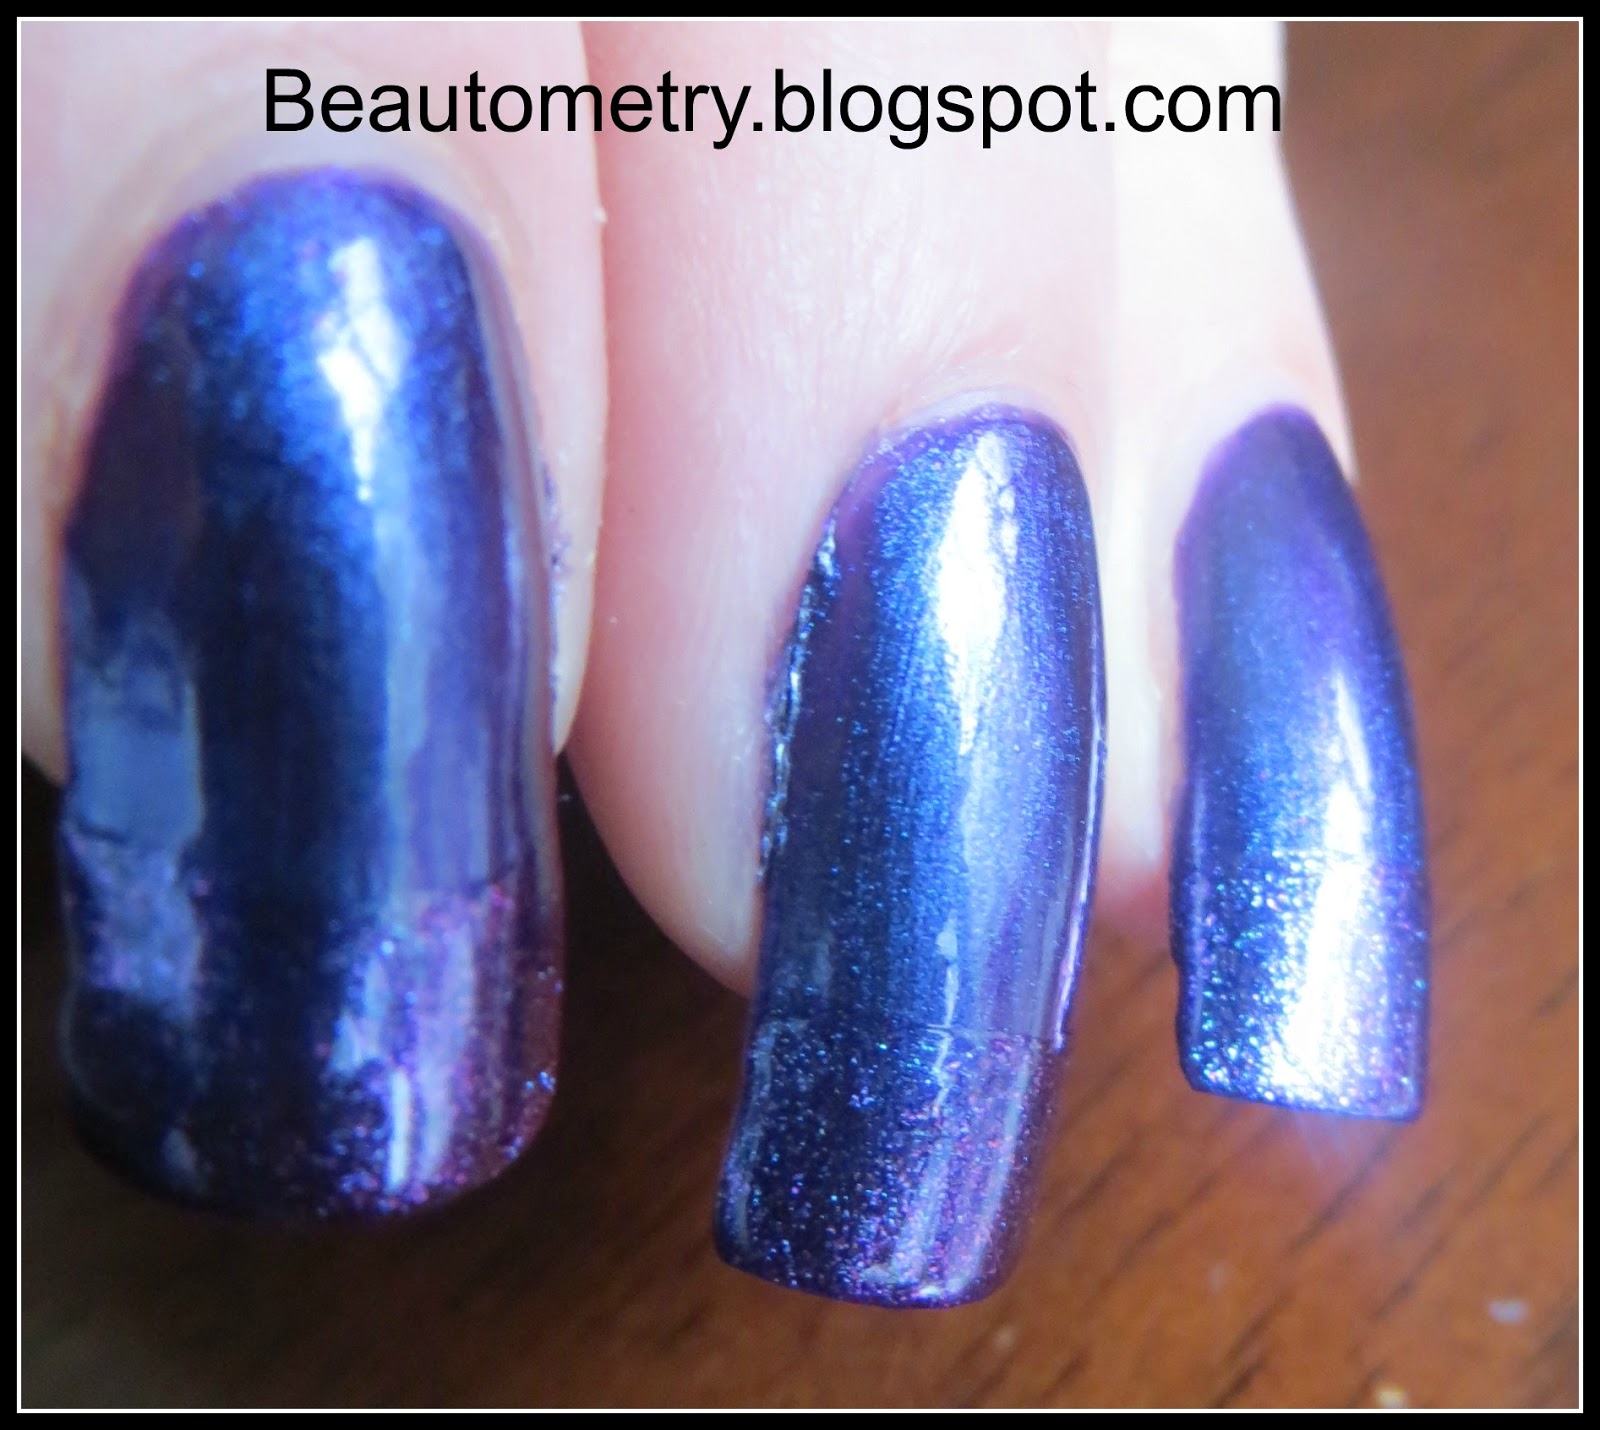
I first started with two coats of Glitter Gal Hidden Violets Soft.
The following two photos show the color change between a pretty purple and a really dark royal blue.


Then, for added interest and texture, I put Glitter Gal Wild Violets Brilliant on my nail tips. I think it sort of looks like those new OPI Sands colors. What a cool effect! Much better in real life :)


Finally, to make the look complete, I did a violet-colored eyeshadow look:


Do you like to match your nails and eye looks?

Sunday, February 17, 2013

Robin RedBreast Eye of the Day

Guess what I saw in my back yard??? A robin! So beautiful and love hearing the birds coming back and singing in the yard.


Robin in the backyard
So, I decided to do an eyeshadow look based on this coloring.
I used the Nyx Blue Eyes palette to create this look.


Doesn't it look awesome! I am soo pleased with how this turned out and think I may try to do a few more bird looks as I spot different ones in the yard. What do you think?

Saturday, February 16, 2013

Minimalist Eye of the Day

Today, I feel like doing a more natural eye look. This look was fun and easy to do!

I used Tarte Beauty& the Box in Envoke the Smoke, Tarte Smooth Operator Amazonian Clay Eye Base, Tarte mascara and Physician's Formula eyeliner.

Here's the finished results:


Have a great day!

Monday, February 4, 2013

Review: Tarte Lights, Camera, Lashes Mascara

The next of the three mascaras that I have been trying out the past several months or so is made by Tarte. Tarte Lights, Camera, Lashes mascara has been wonderful to use!

Tarte Lights, Camera, Lashes Mascara
First, let me discuss product packaging. I usually don't care about that; but in this case I actually don't like the weird type of package for this mascara. It is in a tube that is encased in some sort of "leather' feeling material. Don't get me wrong, I really like the snakeskin purple finish look, but I find it a waste that it is basically material around the actual tube. Luckily, it doesn't mess with application of the product and it is probably the only thing I actually dislike about this mascara.


In the photo above, you can really see the difference between my lashes with and without the mascara. The eye on the left has the Tarte mascara on it and the one on the right does not. This photo really shows such a dramatic difference this mascara makes!

I absolutely love this mascara. It is very creamy, easy to apply, lasts all day. Basically, everything that I would want in a mascara. It makes my eyes really standout and makes those eyelashes look so full and gorgeous. These are my natural lashes and this mascara really makes them look wonderful.

Overall, I will definitely be using this mascara again and will recommend it to anyone that is looking to enhance their natural lashes and not wear false lashes to do it. The tube of mascara lasted me about 4 months exactly and just ran out. Luckily, I already have a new tube!

Sunday, October 14, 2012

Swatch: OPI Coral Reef Orange Holographic and Matching Orange Eye Look

OPI Coral Reef


This is OPI Coral Reef from the 2003 Summer For Shore Collection. It is a really nice subtle orange linear holographic. Great for October fall manicures because the sun may still be around, and of course since it's orange!


Here are a few more angles to see more holographic goodness and the richness of this polish. It applied nicely and was pretty opaque, even after only 1 coat!

And here is a matching orange eye look:

Orange Eye Look

Orange Eye Closeup

Tuesday, February 7, 2012

Superbowl 2012 Manicure!!

I don't really watch football, but I like doing my nails an we were going to a Superbowl party. So why not?

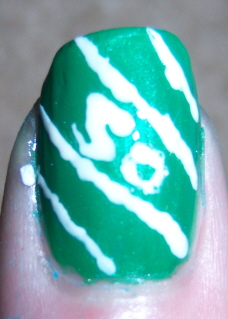
This is what my nails looked like with just the base colors on them. I used Sally Hansen Extreme Wear in Going Green and OPI Fresh Frog of Bel Air for the accent nail.


 Here is each hand with closeups of the respective artwork. I made a goal post on the pointer of my left hand and a football on the pointer of my right hand. I wanted it to be like a football flying over the goalpost. I used various colors to achieve this look including the Layla Magneffect in Golden Bronze.

Thumb shot

Here is my eye look. I used a bright green in the corners, darker green in the middle and brown to create a smokey look.


Saturday, February 4, 2012

Santa and his Chimney


Here is a photo of the items I used:
-OPI Girls Just Want to Play
-OPI Baby It's "Coal" Outside
-China Glaze Sexagon
-Ulta Set The Nude
-Seche Vite Top Coat (Not pictured)
-XL Stamping Plate A

Started out with OPI Girls Just Want to Play as a base on all nails.
- Took OPI Baby It's Coal Outside with the "brick-like" image from the stamping plate and did pointer, middle and pinky fingers. I then did those 3 tips as well. I put China Glaze Sexagon on my ring finger as an accent to be sort of like snow. I then painted my thumb with the Ulta polish and drew the santa face with a dotting tool. I used Konad White and Red for the hair and hat details.


Here's the finished look! LOVE the holo in China Glaze Sexagon.


Interesting close-up of the holograph in regular evening light. I thought this looked really cool. Kind of like trying to take a photo of fireworks or lights at night.


Here's a neutral eye look I also did. I used some colors found in a pallette I bought around Christmas time at Dollar General.

Wednesday, November 2, 2011

Swatch - Sinful Colors Fiji

This is Sinful Colors Fiji. It is a dark purple color and the photo is a little lighter and bluer than real life.


This photo is more color accurate. It s a nice dark purple and applies nicely, although mine is older so it was a little thicker.


I added OPI Black Shatter over it and they go very well together!


Here is a purple eye look I did with the Stila color pallette and LA Splash Cosmetics glitter eyeliner.


And a close-up to show the glitter liner better. I really love the liquid liners from LA Splash, they come in sooo many colors and are AWESOME!

Friday, September 9, 2011

ZigZag Gradient Manicure and Eye Look


This manicure was really fun to do! I think it turned out pretty well (ignore the non-cleanup on the cuticles going on there!).

The first thing I did was paint my fingernails all over with a base color (Funky Fingers Southhampton Seafoam). This was the lightest blue, almost a sea foam green, that I used.
I then painted about 3/4 of my nail with the next color, the next darkest blue that I had. (I do not remember what that was that I used, perhaps a Finger Paints)
Next, I painted half of my nail the darkest blue that I had, Sinful Colors Midnight Blue.
I then took my Konad White stamping polish and used the zigzag pattern from Konad plate M78.
The last thing I did was put Funky Fingers Black Knight on the tips and then a nice thick coat of Seche Vite over it.

Here's a close-up of 3 of my fingers (once again, please ignore the lack of clean-up). It kind of looks like a water marble drag type look. I hadn't even planned it this way, but each band of zigzags ended up on each color and looked really awesome.


My eye look was created with the Stila Color Wheel. I tried sorta matching my eyes with the blue light to darker look. I used Mary Kate and Ashley blue eyeliner and L'Oreal Mascara.


Look with eyes opened :)

Sunday, August 14, 2011

Emerald Eyes


These are 2 different, yet similar looks I created and continue to use because I really like the way the green turns out. I enjoy the way that I was able to actually use different colors and products to create a full look in the green color family.


The products I used are:

-I first put on LA Splash Eyeshadow Sealer/Base

-Then, I use the Bare Minerals Contour eyeshadow brush and put the bright green from the L'Oreal HIP duo Riotous on my lid to the crease line

-I then take the green from the Avon true color quad in lush blush quad and put it in the crease area

-Then using the dark green from the HIP duo, I put that in the corner of eyes about a third on the lid

-For the blending color, I use the green from the Avon quad candy sweets and then blend everything together to get a nice soft shift between colors

-Lastly, I put on the highlight for my brow area of cover girl eye enhancers, not sure what color it is though, has glitter in it


-For eyeliner, used either green or Mary Kate and Ashley lagoon eyeliner

-Mascara is L'Oreal brown

Monday, July 11, 2011

Nail Stamping AND Shatter!

I kept on the pink and decided to do some nail stamping and Shatter.


I used:


-Pink is Finger Paints Did You Ast-Her Out?


-On Accent Finger I painted Sinful Colors Pinky Glitter and then put OPI Black Shatter over it


-I used Funky Fingers Dark Knight to stamp in black the design from plate BM19


-I then used a dotting tool with the Pinky Glitter to put in the middle of all the circles


Monday, July 4, 2011

Happy 4th of July!

My manicure for 4th of July is all red, white and blue. I'm actually really proud of this one. I decided to go all out and this is what it turned into.


Here is a close-up of my thumbs. I did that with nail art brushes and it turned out better than I had expected. The way I found to steady my hands easier was to rest the finger on the table and also rest my hand while moving the nail art brush. This helped tremendously!


The products that I used were:


-Blue is Sinful Colors Midnight Blue


-Red is Sinful Colors Striper polish


-On thumbs and ring fingers I used OPI Alpine Snow Matte


-On the pinky, pointer and middle fingers I used Revlon Powder Puff for the white


-Red crackle is Sally Hansen Crackle overcoat in Cherry Smash


-Blue crackle is Sally Hansen Crackle overcoat in Distressed Denim


-The holographic glitter polish on the ring fingers is Funky Fingers Baby Baby Baby from their recent Justin Bieber collection


-Topped off with a coat of Seche Vite


I must say that I like the Sally Hansen crackles. The color is bright and it is thinner than the China Glaze and OPI versions. It cracks nicely as well. I put a thin coat of each on the nail and those are the types of cracks I got.


Here is my eye of the day (EOTD). I used the Coastal Scents 88 pallette and a Revlon white color for the highlight. I even got compliments! :) I used blue eyeliner and put some Victoria's Secret glitter eyeliner in areas too (but you can't really see that in the photo).